December 17, 2006

The Aftermath of the Storm, and the Quest for Coffee


This week's entry has been guest written by Heather Hurley. Thanks Heather! I loved the story and the coffee. Maybe you'd do it again sometime? And, next time I think we should be more prepared with, perhaps, a portable coffee maker?

by Heather Hurley, coffee aficionado
The rest of the country is more than likely unaware (due to the non-coverage of our current Pacific Northwest Crisis) that many areas have been without electricity for going on three days now. The Eastern Suburbs (where Bekah and I live) and the surrounding rural areas were hardest hit when the wind storm of the century whipped through the Pacific Northwest late last Thursday night. I spent most of the night listening to trees cracking open and my windows shaking in the almost futile attempt to block 75-110 mph winds. Just as I was about to doze off to sleep a deathly silence shocked me wide awake. The power went out at exactly 12:52-am.

It's not a big deal to go without electricity for a few hours so I calmed myself down thinking that life would be back to normal by the time I woke up that morning. I was wrong. Day one with no electricity Bekah came to my door around noon wearing 8 layers and bundled up for a Minnesota winter. She sat down grumpily "I can't believe we still don't have power!" Bekah has since interjected this comment into conversation at least once an hour for the last 72 hours. Little did she know at the time that now, on day three, 80% of the over a million people affected by this would still be without electricity- including her. All we could think or talk about was a piping hot cup of coffee, a nice jolt of caffeine to bring us out of our lethargic mood.

I can go without a hot shower for a day, I don't need a lighted mirror to prepare myself for the day and I can even deal with having to wear 12 layers while sitting in a dark room staring at a blank wall...for a day, but any day without coffee is a bad day.

I decided to venture out in search of not the Perfect Cup of Coffee, but ANY cup of coffee. I would go for Perkins coffee as long as it was hot. I had no idea the extent of the damage, block after block and mile after mile I passed non-functioning traffic lights and every single grocery store and retailer was closed (I guess people don't know how to count money without functioning computers). Defeated I turned home with a continuing chant at the front of my mind, "need coffee, need coffee, need coffee."

When I returned home I grabbed my whole coffee beans out of the cupboard and began frantically grinding them with my mortar and pestle. Once the beans where coarsely ground I ran lukewarm tap water through a filter and poured it over the beans into my French press. I let it sit for about 45 minuets before agitating the plunger to bring out as much of the coffee flavor as was possible with lukewarm tap water.

I decided to share the wealth and walked myself over to Bekah's house. Even with the more-than-a-little-bit of grounds remaining (that were spit out into the sink with every sip) coffee has never tasted better (or chunkier).

Today, with the memory of that first day without our precious elixir, Bekah and I made a trek across the lake to the glowing city lights of Seattle, most of which has maintained a constant flow of electricity during this ordeal. We went through a Starbucks drive-thru for, you guessed it, coffee. When I pulled up to the window it was cracked and splintered. The barista informed us that someone had tried to break in during the power outage. I guess that I'm not the only one whose caffeine addiction drove them to desperate ends....."


The author saves the day

with supplies as we prepare

for a long cold dark night.

December 10, 2006

Roasted


A roast, according to Wikipedia, is "an event in which an individual is subject to publicly bearing insults, praise, outlandish true and untrue stories, and heartwarming tributes.... Anyone who is honored in such a way is said to have been "roasted". Why not honor fruit in the same way? Only instead of roasting with jokes, lets turn up the heat in the oven.

My copy of Barbara Kafka's book Roasting sits on my cookbook shelf in my direct and daily line of sight from both the kitchen and my dining room table. Its simple title has been burned into my subconscious and little by little I have felt more and more the need to roast things...ok, everything. Especially interesting to me is roasted fruit. What will the miracle of caramelization do to the natural sweetness of an ordinary apricot, papaya, or plum?

You will find the Muscat Caramel to be an amazing addition to the pears. There are different flavors of Muscat. The amber-gold sugar syrup brings the dessert to ethereal heights.


Roasted Fig- Stuffed Pears with Muscat Caramel Sauce
Adapted from Price Kushner
Serves 4


Ingredients
-- 4 Pears, they don't necessarily need to be ripe.
-- 1/2 Cup sugar, white or brown, for pears
-- 5-6 Medjool dates, pitted
-- 1 Cup Muscat
-- 1/2 Cup sugar, white, for caramel

Directions

(Click each image to enlarge the directions.)


Directions for Caramel Sauce
(Click image to enlarge)

Notes from the Kitchen

* I used both brown and white sugar to see which seemed to work better for roasting. I didn't find much of a difference between the two during the roasting. The only difference I noticed was that the fine grain sugar coated the pears more evenly than the large granules of Sugar in the Raw.

* In the picture for step 5 you might have noticed that the pan I used was too shallow to hold 1 inch of water. That was a mistake. Beware...if the water evaporates while roasting you will probably have massive billows of smoke coming out of your oven (as I did). This is not the pears that are burning. It is the sugar on the bottom of the pan. If you would like to avoid smoke alarms going off be sure to have water in the bottom of the pan for both roastings. You've been warned...

*Don't be afraid of the caramel. It is easy, just pay attention to it and you will have an amazing sauce to coat your pears with.


December 03, 2006

The Recipe Burglar Strikes: Autumn Nachos


As I was searching for a recipe for this week's post I do as I always do, flip through my three-ring binders of recipes, think about what I feel like cooking, eating, and writing about, and then imagine ways to re-work the recipe. On the blog, I note where the inspiration for the recipe came from and then move on, with pictures and text on how to make the recipe and any suggestions that I think might help you, dear reader, in your kitchen.

Last month Food and Wine magazine printed a rather alarming article on the idea that recipes might, in the future, be copyrighted. You can read the article here. Not long after, a well-trod blog, http://www.megnut.com/, hosted a discussion about the issue which you can read here. OK. So enough with the links. I'll stop. But the discussion can be summed up with this quote, "If a recipe is good it should be used by as many people as possible regardless because eating is all about enjoying food."

On that note, I'll proceed. This week's inspiration came from my friend Sharon and her fabulous salad and dressing. It made its debut on my thanksgiving table, and, as with most thanksgiving dishes, leftovers from the salad could be found in my fridge the week after. Leftovers too good to toss out: prosciutto, Gorgonzola, candied walnuts, pear. The food deserved a replay. Besides re-issuing the same salad, what could I do? Why not crostini? So the the thanksgiving leftovers appeared on my plate with the help of French bread turned crostini, pears caramelized with a decent roasting, and prosciutto made crisp with a turn through the oven. With a leap of the imagination, when I plated it up it looked like nachos. So, as a stand against recipe copyrights and legal formalities, I present:


Autumn Nachos
Inspired by Sharon
Ingredients
--French bread, about half of a loaf
--walnut oil
--1 Cup spinach
--2 Tbs. Gorgonzola cheese
--1 apple, such as Fuji
--1 pear
--2 slices of prosciutto
--2 Tbs. candied nut, such as walnut*
--Oil dressing to taste**

To make the crostini
1) Preheat oven to 350 degrees F.
2)Slice French bread on the bias, 1/2" thick.
3)Spread out in one layer on a baking sheet.
4)Lightly drizzle both sides of bread with walnut oil.
5)Salt and pepper to taste.
6)Bake in preheated oven until golden brown, about 8 minutes. If you want both sides crunchy, flip the crostini over and pop back into the oven, toasting the second side until golden brown, about 8 minutes.


To crisp the prosciutto
1)Place prosciutto on parchment-lined baking sheets.
2) Bake in 350 degree F oven for about 8 minutes, or until crisp.


To roast the pear
1) Heat oven to 400 degrees F.
2) Thinly slice the pears and place on parchment-lined baking sheet.
3) Bake about 16 minutes, flipping the pears halfway through to brown both sides.


*To candy the walnuts
Ingredients
--I Tbs. butter
--1 Cup walnuts
--1 Cup sugar

Directions
1) Butter a baking sheet and set aside.
2) Place walnuts in skillet and place over medium high heat. Stir frequently. Toast until fragrant, about 3-4 minutes. Remove nuts from heat.
3) Melt 1 Cup sugar in a skillet over low heat. Stir constantly.
4) When the sugar becomes a light brown, when it has caramelized (310 degrees F on a candy thermometer), stir in 1 Cup walnuts and mix until well coated.
5) Pour mixture onto prepared baking sheet. Let it cool.
6) Crush the brittle into small pieces.


**Oil Dressing
Ingredients

--1/2 Cup walnut oil
--1/4 Cup cider vinegar
--1 shallot, minced or pressed through garlic press
--2 Tbs. lemon juice, fresh
--1 Tbs. maple syrup, use the real stuff
--1/4 tsp. salt
--1/4 tsp. pepper

Directions
1) Combine all ingredients in a screw top jar and shake (or combine in a bowl and whisk).
2) Drizzle over Autumn Nachos to taste.
Plating the Nachos

(Click to enlarge)

Tips and Notes from the Kitchen:
* Roasting pears in the oven brings out flavor that might otherwise not be there if your pears aren't very ripe.
* Brittle becomes praline when it is crushed or ground into small pieces.
* This is a perfect lunch for one or an appetizer for a crowd, just increase or decrease the ingredients depending on your needs.

Last words for this post are from George Bernard Shaw:
"If I find in a book anything I can make use of, I take it gratefully.
My plays are full of pillage of this kind."
So pillage from my table and enjoy good food.


November 26, 2006

The Hard Working Nut

There always seems to be one at every holiday party. The nut bowl. But it's a good thing. A handful of nuts can keep starving guests from ransacking your kitchen and demanding dinner be served.

Nuts can be purchased sugared or spiced, salted or unsalted, shelled or un-shelled. There are so many options when it comes to nuts. Are you ready for one more? How about the option of not having to shell a few hundred nuts, but still being able to spice them however you want?

Since I was already planning on spending the week in the kitchen I decided to go overboard and spice up some walnuts. This project, unlike last week's ice cream was quick and didn't need any special equipment or lots of time to get tasty results.

For help with the spicy nuts I turned to Nicole Aloni's Secrets from a Caterer's Kitchen. I made a few cups of these spicy nuts and they have served me well -- standing in during cards games after the big thanksgiving dinner, in a bowl while I read in my comfy green chair, and an easy handful to grab while running out the door for last minute grocery shopping. The great thing about spiced and sugared nuts is that they can generally last about 2 weeks at room temperature in an air-tight container.

Spicy Nuts
Adapted from Nicole Aloni

Ingredients
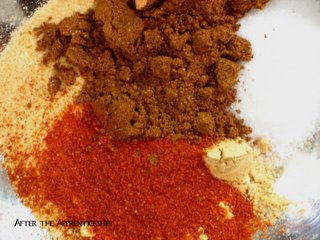
--1/2 tsp. garlic powder
--1/2 tsp. ginger, ground
--1/2 tsp. cayenne pepper
--2 tsp. garam masala
--1 tsp. sugar
--1 Tbs. oil (vegetable, peanut)
--2 tsp. unsalted butter, clarified*
--2 Cups shelled, unsalted nut (walnut, almonds, cashews)
--2 tsp. lime juice, fresh
--1 tsp. kosher salt


Directions

1) Mix first 5 ingredients in a small bowl.
2) In a large saute pan, heat the butter and oil over medium heat. Add the nuts, coat thoroughly with the oil, and stir until they begin to toast and are fragrant.


3) Add the spice mixture to the saute pan and coat the nuts evenly.

4) When the nuts are brown (about 4 minutes), sprinkle on the lime juice and cook until the nuts are dry (about 1-2 minutes).


5)Remove the nuts from the heat and cool completely on a baking sheet.

See? Quick and easy.

Kitchen Tips

*To make clarified butter, warm butter in a sauce pan over medium heat. Once it has completely melted take it off of the heat and let it cool for about five minutes. Skim the white foam off of the top. If you look into the bottom of the pan you will see white milk solids settling on the bottom. Carefully pour the clear yellow liquid (the clarified butter) leaving the milk solids on the bottom of the pan. The reason to clarify butter? It has a higher smoke point which means it can withstand higher temperatures without burning. Want to know more? Check out cooking for engineers.

November 18, 2006

All Mixed Up


Gourmet. Food & Wine. Cooks Illustrated. Savour. All of the November back issues were flipped open and spread out on the dining room table. A feast for the eyes and imagination -- a glimmer of what was to come on Thanksgiving. But, of course, it was a vision of unattainable perfection.

It was Wednesday, just shy of a week from Thanksgiving, and I was planning the annual feast. My goals were lofty: a completely planned meal and accompanying grocery list by morning's end. However, I had a looming deadline teasing me in the back of my brain. One cranberry apple pie promised to Jenny for her party on Friday and I had yet to make the dough. So this really wasn't the morning to be lingering over coffee and my dreamy magazines.

As I was flipping through Gourmet, something caught my eye. It was a recipe for cranberry ice cream. I was planning on picking up a half-gallon of vanilla to go with the pie at the grocery store, but how good would it be to have homemade ice cream? And the cranberry in the pie would be a perfect match to the sweet creamy confection. I could taste it already....


Now where was I again? Thanksgiving dinner, right. That would have to wait. My ice cream maker was calling to me from the depths, and I mean depths, of my cupboard.
After a lot of finagling with various canning equipment, the cast iron dutch oven, and all of the lids for my pots and pans I found it. The ice cream maker. It needed to be dusted. Actually it was my ice cream making skills that needed to have the cobwebs blown off. But I was sure the ice cream would be ready for its debut with my yet-to-be-made pie. Quite sure.

After re-reading the recipe I realized maybe I had been a bit too sure. This was going to take some work. Cranberry ice cream doesn't come easy. The first challenge? Equipment. I was able to overcome the biggest hurdle, the ice cream maker, by randomly receiving Nana's this summer. If you don't have an ice cream maker I would say that this recipe will be nigh impossible, unless you subscribe to the coffee can method.

The other equipment needed (or highly recommended) that I didn't have? For one, a blender. Secondly? A stand mixer. I called Heather. She is my blender girl and I was desperate.

Me: "Heather?"
Heather: "Yea??"
Me: "Can I borrow your blender?"
Heather: "Sure. When do you need it?"
Me: "Weeeellll, actually... now?"


This is why carefully reading through a recipe is critical. So when the cream and sugar are heating to a very specific temperature on the stove and the cranberries are almost done you don't read the next line of the recipe and see "transfer cranberry mixture to a blender and puree until smooth." Huh? How did I not see that before? Back to the desperate call to Heather.

Heather: "Well I was just going to leave for class, I'm running a little late and it is almost finals week..."
Me: "I'll just come over real quick."
Heather: "Alright..."

Now I could have sucked it up and not used a blender. I could have used the food mill, but I can assure you it wouldn't have been as pretty or as easy as using something electric. And the other major equipment hurdle I mentioned earlier? The stand mixer? That wasn't to be easily remedied by a quick phone call. So I plugged in my hand-held mixer and hoped that the motor wouldn't start on fire.

Equipment aside, the trickiest thing about this recipe, which can be overcome with attention and a sieve, is the fact that eggs, when heated, like to congeal. Sugary scrambled eggs in a sauce pot is no laughing matter, especially when you are expecting a creamy custard.

There are two steps in the recipe that have the potential to turn the egg mixture not into the luscious custard you want but rather into a breakfast dish. The first is step number 3. When you add the hot cream to the eggs, add a little cream at first, then stir. Add a little more cream. Stir. Add the rest of the cream in a steady and self-confident stream. Stir. By doing this, tempering the eggs, you are slowly heating them instead of shocking them with a blast of hot cream. The other step with a high potential of congealed eggs? The second part of step 3. When you heat the eggs and the cream in the saucepan, follow the instructions and don't heat the eggs over 170 degrees (if you don't have a thermometer just don't let the mixture boil). After the second part of step 3 pour the custard through a sieve. Any evidence of congealing that happened in the past two steps will be erased with a quick spin through a fine-mesh sieve.


Cranberry Ice Cream
Adapted from Gourmet Nov. 2005

Ingredients
-- 2 C heavy cream
-- 1 and 1/2 C plus 3 Tbs Sugar
-- 6 egg yolks
-- 1/8 t. salt
-- 4 C (24 oz) fresh / frozen cranberries


Directions

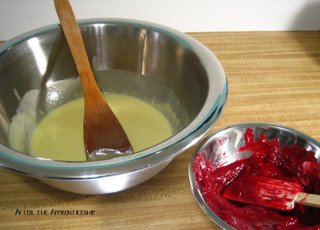
1) In a medium saucepan, bring cream and 1/2 cup of the sugar to a boil. Stir from time to time to dissolve the sugar. Take off of the heat and cover.


2) With a mixer (preferably a stand mixer) beat together the yolks, salt, and 3 Tbs of sugar. The goal is to triple the volume of the yolk mixture and make sure it is thick enough that it forms "The Ribbon"* that can hold for 2 seconds. This will not take long with a stand mixer. If you have a hand-held mixer I hope that you have a good book to read because this is going to take awhile-about 10 minutes.

3) Begin mixing at a low speed and begin to slooooooowly pour in the hot cream mixture. Once it has all been added, pour it all back into the saucepan and begin to heat, stirring (I suggest flat-bottomed wooden spoon, but use whatever suits your fancy), until the custard reaches 170 degrees and becomes thickened. Remember, you don't want scrambled eggs.


4) Strain the custard through a fine-mesh sieve and let it cool to room temperature.

5) In a heavy saucepan, combine the cranberries and the remaining sugar. Bring the mixture to a boil over medium high heat, stirring. Once it reaches a boil, reduce the heat to low and simmer, covered. Stir occasionally. Simmer until the cranberries burst.

(The original recipe called for a cinnamon stick. I found that I didn't even notice a hint of the spice in the ice cream.)
6)Puree the cranberries in a blender until they are smooth. Press the cranberry mix through a fine sieve. Mix with the custard. Chill the mixture in the fridge. This will take about an hour.

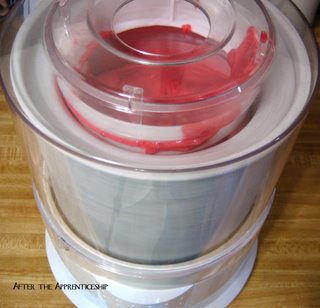
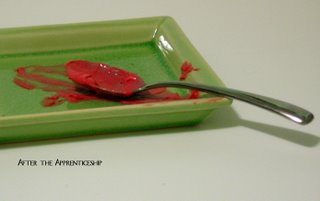
7) Pour the chilled custard into your ice cream maker. Once your ice cream maker has done its work, freeze the ice cream for at least 5 hours, overnight is best.

Quick Tips

  • The recipe calls for 1 1/2 Cups + 3 Tbs sugar. Just remember that in the first step, not all of the sugar is used. Mix only 1/2 cup of the sugar with the cream. The rest of the sugar will be used later.
  • A standard 1 -1 1/2 quart ice cream maker is the perfect size for this recipe.
  • Remember, there is a lot of heating, then cooling, then heating, then cooling, and then freezing involved. This all takes time. I would highly suggest making this the day before you would like to eat it.

    *Julia Child in Mastering the Art of French Cooking has a perfect description of how to form The Ribbon when beating egg yolks and sugar. I won't try to reinvent the wheel. Here are Julia's instructions: "To accomplish it [the ribbon], add the sugar gradually to the egg yolks in a mixing bowl while beating with a wire whip or an electric beater; continue beating for 2 to 3 minutes. The mixture will turn a pale, creamy yellow, and thicken enough so that when a bit is lifted in the beater, it will fall back into the bowl forming a slowly dissolving ribbon on the surface of the mixture. Do not beat beyond this point or the egg yolks may become granular."

November 12, 2006

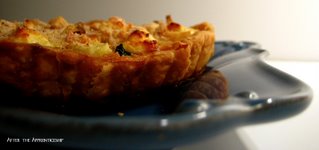
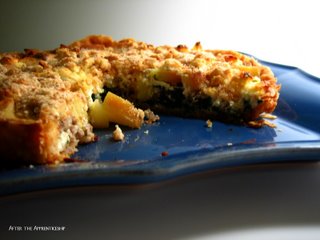
Apple and Sausage Tart


This fall I've made much of the requisite apple dishes. You know the drill- apple pie, apple crisp, baked apples. Yummy, but after awhile-can I say it? Boring. I was going through my binder of clipped-I have to try these someday-recipes and found a new one. I wouldn't have to pass up the gleaming piles of the fruit at the farmer's market again.

The gem that caught my eye? Apple and sausage pie printed in the magazine Edible Twin Cities. I looked over the recipe. Butter, flour, sausage (of course), apple, shredded cheddar cheese. Hmm. I love cheddar cheese, but thought that feta would be tastier. And since the spinach fiasco was over I picked up some crisp leaves at Ballard Market.

The more I thought about the combination, the more I realized I had seen it somewhere else, in specialty sausages. Turkey sausages with apple, or with spinach and feta. I had the backing of butchers, so I knew I was heading down the right track.

The big question though was Tart? or Pie? The original recipe was for a single crust pie. Frankly, with the whole overdose of apple pie I was kind of sick of pies. Why not try to make a tart instead? I like the crunchy ridges that the pan makes on the crust and my tart tins haven't been in heavy rotation lately. It was settled.

So is there any difference between a tart and a pie? Well, the shape-- the most obvious difference-- seems to be the only one. The index in Baking with Julia notes that pie and tart dough are one in the same. The Joy of Cooking also comes to the same conclusion. So is it just the pan? Perhaps. I checked out Wikipedia to find out more. It turns out that a pie is generally considered a baked shell that completely encases a sweet or savory filling. Bottom crust only pies are thought of as tarts or tartlets. And, the fancy sounding tarte tatin? An upside down, single crust fruit tart with a very interesting and much debated history. But, back to the pie and tart quandary. After my Wikipedia search I was left with a burning question: If a tart is only a single crust pie, why do we have tart pans at all? Why not just use a pie pan to make a tart? And what about the free-standing rustic tart? That doesn't need a pan at all! Google-ing was in order because my cookbooks weren't spilling any more secrets.

The results? Tarts are cooked in tart pans (most with a removable ring) so that they can be taken out of the pan easily and displayed nicely on a buffet or table. What a simple explanation.


Apple and Sausage Tart
Inspired by Pepin Heights Apple Farm
Serves 4-6


Ingredients
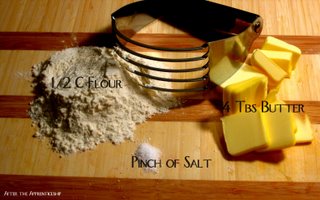
--4 Tbs. unsalted butter, cold and cut into small pieces
--1/2 cup all-purpose flour
--1 Tbs. ice-cold water
--1/2 lb. sausage, uncooked
--1 Tbs. butter
--1 apple, cored and diced
--2 egg yolks
--1 egg
--1 cup heavy cream (or half & half)
--salt & pepper to taste
--1/2 cup feta
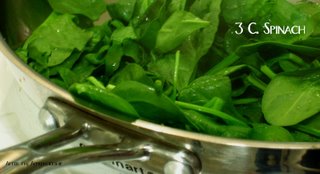
--3 cups spinach

--Breadcrumbs for sprinkling on top, optional

Directions


1) With a pastry blender, cut 4 Tbs. chilled butter into flour and salt until coarse crumbs form. Add 1-2 Tbs. of ice water to bring the dough together. Wrap and chill in the fridge for a half-hour. Preheat the oven to 350 degrees.


2) When the dough has chilled, roll the pie dough out on a lightly floured surface. Create a circle that is large enough to cover a 9" tart pan. Press the dough into the tart pan and weigh it down with dried beans or pie weights. Trim the excess dough and bake the crust for 20-25 minutes.


3) Remove the sausage from its casing and saute over medium heat, crumbling. Drain the the meat if there is too much grease. Remove the meat from the pan.

4) Heat a separate pan, add the remaining 1 Tbs. butter. Saute the apple until it has just softened.

5) In the pan used to cook the sausage, add the spinach and cook over medium heat until it just wilts, about 3 minutes. Remove the spinach and shock under cold water. Squeeze the spinach of excess water and chop.


6) In a bowl, combine the egg and egg yolks, cream, salt, and pepper. Mix together lightly with a fork or whisk.

7) Place the sausage, spinach, and apple in the pre-baked crust. Cover with crumbled feta and pour the egg mixture evenly over the tart. If you want to use bread crumbs, sprinkle them over the tart now. Bake for 45-50 minutes. Before you cut into this dish let it cool for about 5 minutes.


Quick Tips...or maybe not so quick tips...

  • Making a tart (or pie) crust is pretty easy, just make sure you use ice water, and very cold butter. Work quick, wrap the dough up, and pop it into the fridge. If the dough becomes unruly let it cool off in the fridge for about 10 minutes and try again.
  • To get your beautiful crust into the tart pan without tearing it, fold the circle half, then fold it in half again so you have a little triangle. Put the point of the triangle in the middle of the tart pan and unfold your dough. If it rips, just use some of the excess dough to patch it up. No one will know and of course it will taste good- it's butter and flour.

  • The amount of pepper to use depends on how spicy or sweet the sausages are. Do you feel like having a little kick with the sweet apples? Find spicy sausage and use as much pepper as you dare. Perhaps you want your tart to be sweeter- without that peppery interruption-- buy sweet sausage and use just a touch of pepper. But use salt. It will make all of the tart's flavors pop.
  • When you pour the egg mixture into the tart shell be sure to either (1) get it all into the shell and don't let any of it overflow or (2) put a sheet pan under the tart pan so when it does spill over the edge of the tart it wont become a permanent fixture in the bottom of your oven. (Why do manufacturers think that making an oven that isn't self cleaning is a good idea? Do I sound bitter? It's because I am.).
  • I used bread crumbs sprinkled on top of my tart. I wish I hadn't. I thought they were too crunchy. However, the tasting panel said that the bread crumbs were perfect. You decide.

November 07, 2006

Oh, the weather outside is frightful...


Yes. It's true. Seattle has neared record-breaking levels of rain in the last two days. The Coast Guard was called to save four people stranded in a van, the Whidby Island Navy search and rescue saved two people, a dog and a cat from iminent flooding, and desparate calls for pizza delivery have sopping delivery men and women wading in waist deep water to present hot-from-the-oven pizzas to waiting, anxious families. Save the pizza delivery guy (or gal) from the torrential flooding.


So, if not pizza, what to cook for dinner? I had wanted something cozy, something to curl up with. I was watching the merciless rain come down on my tiny rosemary and oregano plants and thought of a red wine mushroom and rosemary sauce I had seen in the magazine Real Simple. I could save some of my rosemary sprigs and use the dried wild mushrooms I recently picked up at Trader Joe's. Perfect.

All that I needed to add was boneless, skinless chicken breast, and a side vegetable--yams would fit in with the woodsy taste of the wild mushrooms, which I had--how easy was this going to be? I would soon find out.

A small detail had to be ironed out. I wasn't sure if I had yams or sweet potatoes in my cupboard. Until recently I had been going along in perfect bliss not thinking much about the subject of Yam V. Sweet Potato, that is until I read Barbara Kafka's book Vegetable Love. Apparently (under the good guidance of the veggie authority and her book ), I found that sweet potatoes are not potatoes (tubers) at all --they are roots! Also, sweet potatoes are not yams, even though some have yam in their common name. Talk about identity crises.

At this point you might be asking 'why doesn't that silly girl just pay attention to what she buys at the grocery?' I feel justified in my lapse. Even if I would have paid attention, Barbara notes that supermarkets often misname yams as sweet potatoes. I felt even better when she comments that eaters, cooks, and writers get them confused. I'm not alone!

Originally I thought I would roast the yams (sweet potatoes?) while I was making the mushroom sauce and chicken. That was not to be. Kafka's first statement on roasting these vegetables was, "do not roast yams." Was I sure I had sweet potatoes? No. But were they yams? I had no idea. No matter how much I tried to identify these mystery vegetables with the description in Vegetable Love, I still felt unsure. What if I guess wrong and they really are Yams? I'd be violating Barbara's first roasting commandment. I decide to play it safe and look for another way to cook these babies. Boiling seems like a good option. Followed by a quick mash in some butter, pepper, and salt. I get the go ahead. Kafka says I can add sweet potatoes or yams to boiling water. Success at last.


Wild Mushroom and Rosemary Chicken Served with Yams
(or were they sweet potatoes?)
--Wild Mushroom Sauce Adapted from Real Simple

Ingredients

-- 2 boneless skinless chicken breast, rinsed and patted dry
-- 1 Tbs. oil (grapeseed works fabulously because of its high smoke point)
-- 2 yams or sweet potatoes, peeled and diced in 1" cubes
-- 2 Tbs. unsalted butter
-- 1/2 lb. dried wild mushrooms (or any fresh mushroom can be substituted)
-- 1/4 cup red wine
-- 1/2 Tbs. fresh rosemary, chopped
-- salt and pepper, to taste

Directions for Chicken and Mushroom Sauce
  1. Preheat oven to 300 degrees F. Place baking dish in oven to preheat.
  2. Re-hydrate your mushrooms according to package directions. Reserve the liqued.
  3. Heat oil in saute pan over medium high heat. Salt and pepper both sides of chicken. When the pan is hot, add chicken. Cook a total of 4 minutes (2 minutes for each side.) Place chicken in baking dish in pre-heated oven. Cook until it reaches the desired temperature (see notes below). It should take about 10-12 minutes.
  4. Using the same saute pan as before, add 1 Tbs. of butter and let it melt. Maintain a medium high temperature. Add the mushrooms and 2 cups of reserved mushroom liqued. Let the mushrooms soften and the liqued condense. Add wine, rosemary, salt, and pepper. Cook for 3 minutes, cover, and remove the pan from the heat.

Directions for Yams (Sweet Potatoes)
  1. Boil salted water in a medium pot. Add the diced yams.
  2. Cook until a fork tine can pierce the yams easily, 15- 20 minutes
  3. Drain. Mash. Add 1 Tbs. of butter, salt and pepper. Cover until ready to serve.


Quick Tips
  • This comes together fast, so have everything ready and life will be a lot easier.
  • If you are using fresh mushrooms, skip the second step, cover the saute pan after adding the mushrooms and let them steam for 5 to 7 minutes.
  • The chicken is done when the juices run clear or an instant read thermometer reaches the desired temperature. And, depending on who you are, that temperature can be a couple numbers. The USDA recommends 165 degrees F. I like my chicken cooked to 145 degrees F. The choice is yours.